As an Amazon Associate, we earn from qualifying purchases. Some links on this site are affiliate links at no extra cost to you. Our recommendations are based on thorough research and editorial judgment.

Print Settings For Watertight Components
To achieve watertight components, several key settings are important. First, use a layer height of 0.1 to 0.2 mm—0.15 mm is ideal for a 0.4 mm nozzle. Wall thickness should be at least 1.5 mm to guarantee solid barriers. Choose materials like ABS or SLA resins for their water resilience. Finally, consider post-processing methods such as epoxy coatings to enhance waterproofing. Each decision, from settings to materials, greatly impacts the final outcome—more details await ahead.
Key Takeaways
- Use a layer height of 0.1 to 0.2 mm to ensure effective gap filling and waterproof performance.
- Set wall thickness around 1.5 mm for enhanced watertightness and minimize the risk of thin walls.
- Employ a moderate print speed of 30-50 mm/s to balance quality with interlayer bonding and extrusion performance.
- Choose high-quality materials like ABS or polypropylene for improved water resistance and durability in aquatic environments.
- Implement reduced cooling fan speeds during printing to enhance inter-layer adhesion and minimize warping risks.
Slicer Settings for Watertightness
You may be interested


To enhance the overall integrity:
- Adopt a layer height between 0.1 to 0.2 mm; this is ideal for efficient gap filling.
- Ascertain consistent layer heights to avoid weak interfaces prone to leaks.
- Aim for wall thickness nearing 100% perimeter fill; overly thin walls only invite disaster.
In essence, careful attention to wall settings, combined with strategic layer management, is the secret sauce for reliable waterproof printing—keeping your creations safely afloat. Additionally, implementing high-quality ABS plastic as your material will further bolster the durability and water resistance of your printed components.
Recommended Products

Engineering Filament: CR-ABS has excellent impact resistance and heat resistance. A widely used thermoplastic engineering plastic

Engineering Filament: CR-ABS has excellent impact resistance and heat resistance. A widely used thermoplastic engineering plastic

【IMPACT RESISTANT & TOUGHNESS】- ELEGOO ABS filament offers excellent impact resistance and durability, ensuring your 3D prints can handle impacts and wear. Ideal for drone mounts, protective cases, rugged outdoor gear, and industrial tools.
Material Selection for Waterproof Prints

Material selection plays a pivotal role in creating waterproof prints that can withstand the test of time and nature. Understanding material durability is key—certain polymers boast intrinsic water resistance, while others require post-processing to achieve waterproof qualities.
- Polypropylene (PP): This hydrophobic champion withstands aggressive chemicals, making it ideal for aquatic environments.
- Nylon PA 12: While elastic and tough, it needs coatings for long-term water exposure.
- SLA Resins: They excel in watertightness, enduring depths that would crush lesser materials.
Environmental factors, such as UV exposure and chemical resistance, also influence performance. By carefully choosing the right material, designers can create reliable components that thrive in their intended settings—breezing through life, much like a well-fitted seal on a boat. Additionally, considering the importance of waterproofing in saltwater applications will further ensure the longevity of printed components.
Recommended Products

①【SUNLU PLA 3D Printer Filament】PLA material is the perfect choice for 3D printing enthusiasts! SUNLU PLA filament is reliable, versatile, and easy to use. No clogs, bubbles, or tangles, its excellent layer adhesion ensures high-quality prints every time. Ideal for beginners and experienced users.

【Creality CR-PETG Filament】Creality CR-PETG combines the benefits of PLA and ABS to reach Eco-friendly and odorless performance. This PETG Filament is feature in good toughness to avoid cracking and warping, enbale excellent 3D printing.
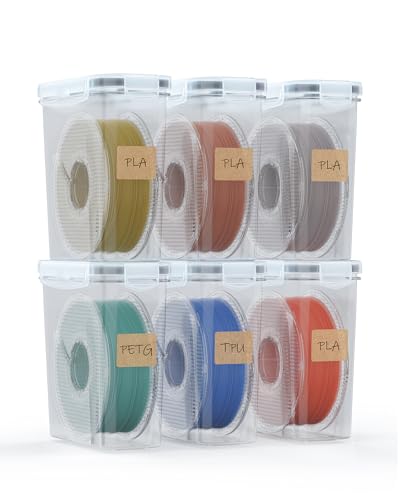
Moisture And Dust Protection For Everyday Filament Storage:Each filament storage box features a silicone-sealed flip lid that helps reduce moisture and dust during daily storage, keeping PLA, ABS, PETG, and TPU spools better protected between print sessions. Includes 2 × 500g desiccant boxes to help absorb excess moisture for more stable filament storage
Printing Techniques for Watertightness

Successfully crafting watertight components requires not only thoughtful material selection but also a keen understanding of printing techniques that enhance waterproofing capabilities.
Recommended Products

①【SUNLU PLA 3D Printer Filament】PLA material is the perfect choice for 3D printing enthusiasts! SUNLU PLA filament is reliable, versatile, and easy to use. No clogs, bubbles, or tangles, its excellent layer adhesion ensures high-quality prints every time. Ideal for beginners and experienced users.

HIGH QUALITY PLA FILAMENT: Made of high-quality PLA, a commonly used thermoplastic material features lower melting temperature and ease of use, low warp and shrinkage, odorless during printing, and provides a glossy surface finish

【1.75mm Glow PLA Filament 】Glow in Dark PLA Filament Contains phosphorescent materials that glow in the dark after absorbing light energy. The glowing effect will be stronger under Sun light or UV light source after 30 miniutes,Enjoy different printing fun with Yousu 3D Glow in Dark PLA filament.
Key Techniques for Waterproofing
- Stereolithography (SLA) excels here, chemically bonding layers for excellent underwater pressure resistance—up to 4000 m!
- For Fused Deposition Modeling (FDM), layer height reduction and increased extrusion temperatures can dramatically improve bonding, reducing those pesky micro gaps.
- Selective Laser Sintering (SLS) offers good water resistance but may allow some absorption, necessitating careful design optimization for prolonged exposure. Additionally, using high-voltage brushless power systems can enhance the longevity of watertight components in demanding environments.
Post-Processing for Waterproofness

Acetone Vapor Smoothing: Eliminates layer lines and minimizes micro-gaps, enhancing waterproofing. This post-processing method penetrates pores in 3D printed parts, allowing polymer chains to bond and create a water-resistant surface layer. While primarily effective on ABS, it can also yield results on PLA and PETG—though outcomes may vary. Additionally, high-quality materials like durable resin and waterproof plastic significantly influence the overall waterproofness of your components. Alternatives like epoxy coatings fill surface imperfections, offering a durable, hydrophobic barrier that works with a wide range of materials. Wax dipping, a reversible approach, fills pores but is less durable, making it ideal for porous filaments. Ultimately, combining these post-processing methods can considerably boost your component’s waterproofness, ensuring functionality meets performance—and a little extra effort goes a long way.
Recommended Products

Complete Starter Kit with Accessories: Everything you need in one box! Includes 10 plastic cups, 4 mixing sticks, 2 droppers, and 2 pairs of gloves – no extra tools required. Perfect for beginners and pros alike, designed to streamline your resin projects from start to finish

High-Performance 3D Print Coating - Clear top coat for smoothing & finishing 3D printed parts.
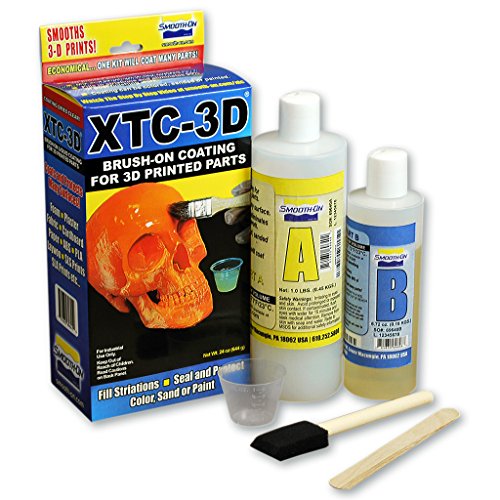
High-Performance 3D Print Coating - Clear top coat for smoothing & finishing 3D printed parts.
Design Considerations

When aiming to produce watertight components, thoughtful design considerations play a fundamental role in achieving success. Key factors include wall thickness and structural reinforcement; for instance, a minimum wall thickness of 1.5 mm enhances watertightness, while thicker sections at seals improve reliability under pressure. Geometry optimization is essential—smooth changes and rounded corners decrease stress concentrations, important for maintaining design integrity.
Furthermore, material selection directly impacts sealing mechanisms and long-term performance. Stiffer SLA resins excel under pressure, while some FDM materials may fail. Print orientation also affects interlayer adhesion; ideal orientation can greatly reduce porosity. Finally, precise sealing surfaces, designed to accommodate O-rings or gaskets, guarantee a solid, leak-free assembly that keeps moisture at bay—no one wants an unexpected splash! One critical aspect to consider during design is incorporating safety alerts, which can help prevent water infiltration and protect the internal components of your parts.
Testing and Validation of Watertight Prints
Testing and validating watertight prints requires a keen understanding of various methods that guarantee both efficiency and reliability in real-world applications. Key techniques include:
- Submersion tests: Parts are submerged to visually check for water ingress detection.
- Pressurization tests: They simulate extreme conditions, confirming seals remain intact.
- Dye penetration: Colored dyes expose hidden leaks when they seep into components.
Seal durability testing is essential; methods like repeated pressure cycling and thermal cycling assess long-term performance. By simulating real-world stresses, these tests confirm components don’t just look good but can also weather the storm—figuratively and literally! Additionally, maintaining ballast management during tests is crucial to ensure that the components remain functional and stable under various conditions. With careful validation, designers gain confidence that their watertight prints will hold up against various challenges, creating reliable and robust applications.
Recommended Products
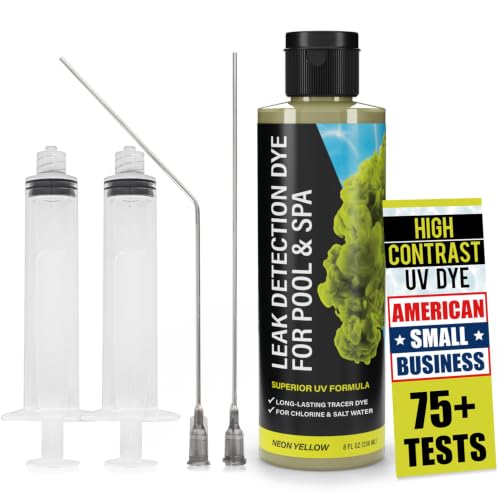
Easily Identify & Locate Leaks: 75+ tests per kit! This pool leak detection kit delivers a High-Contrast UV dye that glows brightly in sunlight and under UV light. It stands out against light and dark surfaces, making it just as effective as traditional blue dyes on light-colored backgrounds. This superior pool dye formula holds together underwater, ensuring easy & accurate leak detection
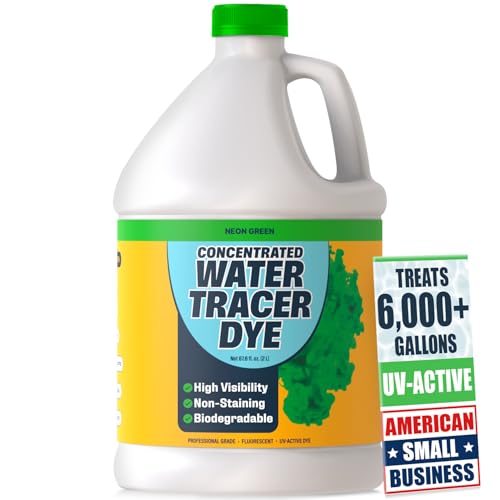
Treats 6,000+ Gallons – This concentrated neon green tracer dye is engineered for efficiency—just 1 oz treats up to 100 gallons of water. One 64 oz bottle covers over 6,000 gallons, making it ideal for everything from pool leak detection and household plumbing to large-scale testing and inspections.

Easily Identify & Locate Leaks - 75+ tests per kit! This pool leak detection kit delivers a High-Contrast dye that easily traces flow paths. It stands out against light and dark surfaces, making it just as effective as traditional blue dyes on light-colored backgrounds. This superior pool dye formula holds together underwater, ensuring easy & accurate leak detection
Increasing Wall Thickness
Increasing wall thickness in 3D printed components can greatly enhance their watertight properties, especially when steering through the trade-offs involved. Typically, starting with a wall thickness of 2-3 mm strikes a good balance between strength and material use.
Key points include:
- Wall Thickness Effects: Thicker walls (4-5 mm) boost mechanical strength and reduce porosity, enhancing water resistance without excessive post-processing.
- Design Optimization: Uniform wall thickness prevents weak points, ensuring structural integrity.
- Material Considerations: Materials like SLA resins excel under pressure, making them ideal for thicker components.
While increasing wall thickness can escalate print times and costs, the benefits of airtight seals often outweigh these challenges, making for a more reliable and durable final product.
Adjusting Infill Density
Adjusting infill density is an essential factor in achieving watertight components in 3D printing, and it can make a significant difference in overall durability.
- Sparse infill (10-30%) creates voids, jeopardizing watertightness.
- Increasing density to 80-100% minimizes leak paths, enhancing structural integrity.
For ideal infill optimization, a balance between 50-80% can be effective—providing decent watertightness without excessive material use. Each increase in infill improves load-bearing capabilities, transforming the print into a stronger, more resilient piece.
Dense patterns, such as cubic or tri-hexagon, bolster internal structures, preventing leakage. Remember, higher infill not only secures fluid containment but also makes parts less prone to deformation. Ultimately, adjusting infill density isn’t just technical; it’s a key component in crafting reliable, watertight creations.
Optimizing Layer Height
Layer height plays a fundamental role in enhancing the watertightness of 3D printed components, building upon the improvements made by adjusting infill density.
- Optimal Range: A layer height of 0.1-0.2 mm, ideally 0.15 mm for a 0.4 mm nozzle, delivers excellent adhesion.
- Leak Prevention: Heights above 0.3 mm increase the risk of gaps, inviting leaks.
- Print Speed Consideration: Lower layer heights yield better interlayer bonding, though they extend print time. A moderate print speed of 30-50 mm/s guarantees consistent extrusion without compromising quality.
Balancing layer height and print speed is essential; while lower heights enhance watertightness, users must weigh print duration against performance—after all, nobody wants a leaky print!
Fine-Tuning Print Temperature
With the right nuances in temperature control, users can achieve bids for watertight excellence that are as solid as a well-cooked pie crust—crisp on the outside and packed with integrity on the inside. Fine-tuning print temperature is essential for layering success; here’s how:
- Optimal Ranges: For PLA, temperatures around 190–220°C strike a balance, while ABS thrives at 230–250°C.
- Flow Rate Sync: Higher temperatures thin the filament, enhancing flow and filling gaps—key to waterproofing.
- Watch for Overheating: Too hot can mean oozing or stringing, compromising quality.
Enhancing Inter-Layer Adhesion
Achieving superior inter-layer adhesion is a game-changer in the quest for strong, watertight 3D prints. Enhanced interlayer bonding boosts adhesion strength, making it essential for durable components. Key factors to evaluate include:
- Layer Height Optimization: A height of 0.12 to 0.15 mm is ideal, balancing pressure on previous layers for solid adhesion.
- Extrusion Width Control: Set extrusion width to about 1.4 times the nozzle diameter—around 0.56 mm for a 0.4 mm nozzle—to maximize bonding surface area.
- Surface Texturing: Textured interfaces promote mechanical interlocking, resulting in stronger bonds than thermal adhesion alone.
Prioritizing these adjustments leads to robust prints that stand up to stress, ensuring your 3D creations are as impressive as they are functional—no more soggy prints!
Reducing Cooling Fan Speed
When it comes to 3D printing, controlling cooling fan speed can make or break the quality of a print. Reducing fan speed is an essential strategy for achieving ideal fan speed optimization, particularly for large components. Here’s why:
- Enhanced Layer Bonding: Slower cooling improves polymer diffusion, boosting inter-layer adhesion and preventing brittle failures.
- Warpage Reduction: Lower speeds minimize shrinkage risks, especially for materials like ABS, which can curl if cooled too quickly.
- Dimensional Stability: A conservative approach helps maintain the integrity of bulky prints.
While it may slightly increase print time, the mechanical strength gained makes it worthwhile. By implementing these cooling strategies carefully, one can guarantee that prints have both durability and a polished appearance, striking a balance that every maker desires.
Retraction Settings for Seam Integrity
In the world of 3D printing, mastering retraction settings is crucial for achieving pristine seam integrity that can elevate an ordinary print into a visually stunning masterpiece. To optimize results, consider the following:
- Retraction Length: Aim for 2–5 mm for direct-drive and 4–7 mm for Bowden extruders.
- Retraction Speed: Balance speed to quickly pull filament back while minimizing clogs.
- Seam Positioning and Randomization: Experiment with random seam positioning to break up visible lines.
Utilizing advanced features like coasting techniques, wiping strategies, and combing settings can greatly enhance oozing reduction. These methods eliminate excess filament and render seams nearly invisible. Ultimately, fine-tuning retraction settings is essential for creating impressive, watertight components that surpass mere functionality—they become true works of art.
Frequently Asked Questions
How Do Environmental Factors Affect Print Watertightness?
Environmental factors greatly influence print watertightness, as humidity impacts filament integrity while temperature variations affect layer adhesion. Inconsistent conditions can lead to micro-gaps, increasing the risk of water ingress in printed components.
What Tools Can Assist in Measuring Print Waterproofness Effectively?
Effective measurement of print waterproofness can be achieved through the use of a moisture meter to assess internal moisture levels and a pressure tester to identify any leaks under controlled conditions during evaluation.
Can Additional Seals Be Applied During 3D Printing?
In a dance with creativity, additional sealing can indeed be applied during 3D printing. Various printing techniques enrich this process, enhancing durability and transforming the final product into a resilient guardian against the elements.
How Does Print Orientation Influence Waterproofing Capabilities?
Print orientation greatly influences waterproofing capabilities by determining how layers bond. Ideal orientations align layers to create solid, waterproof layers, while inappropriate angles may develop gaps, compromising the integrity of the printed object against water intrusion.
What Are Common Troubleshooting Tips for Watertight Prints?
Common troubleshooting for watertight prints includes utilizing leak detection methods, ensuring proper surface treatment, checking for under-extrusion, and repairing STL files. Careful diagnostic approaches greatly enhance print integrity and minimize water penetration risks.


