As an Amazon Associate, we earn from qualifying purchases. Some links on this site are affiliate links at no extra cost to you. Our recommendations are based on thorough research and editorial judgment.
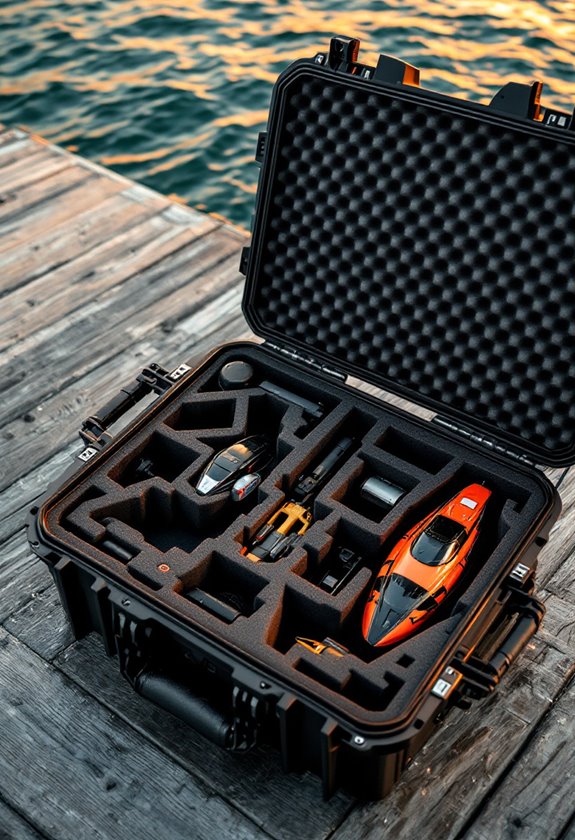
Carry Case And Foam Cutout Tutorial
Creating a custom carry case with foam cutouts guarantees peak protection for equipment during transport. Start by selecting the right foam type—polyurethane for delicate items or polyethylene for heavier gear. Choose a density that meets your needs—think 2 lb./ft³ for soft cushioning or higher for robust support. You’ll need tools like scalpels and measuring mats for precision cuts. Finish with aesthetic touches, making certain gaps remain absent. There’s much more to learn about maximizing efficiency and safety in your transport solutions.
Key Takeaways
- Select the appropriate foam type and density based on item fragility and protection needs to ensure optimal cushioning.
- Use precise cutting tools like scalpels and hot knives for creating accurate foam cutouts without causing damage.
- Create templates from flexible materials to accurately outline and adjust foam cutouts for a snug fit around your items.
- Layer different foam types for improved impact absorption and vibration dampening to protect sensitive equipment during transport.
- Personalize your carry case aesthetics by choosing colors and textures that complement the case while ensuring a professional appearance.
Understanding Foam Types for Your Carry Case
You may be interested


When selecting the ideal foam for a carry case, understanding the various types of foam is essential—like choosing the right tool for your toolbox. Different foam materials cater to specific needs, each offering unique cushioning benefits:
- Polyurethane Foam (PU): Soft and flexible, it absorbs impacts, making it ideal for delicate items.
- Convoluted Foam: Its egg crate design spreads pressure evenly, perfect for sensitive electronics.
- Polyethylene Foam (PE): Firmer and water-resistant, it’s suited for heavier gear, ensuring strong protection.
- Velour Foam: Great for display cases but less durable under frequent handling.
- Custom Foams: Tailored to fit unique equipment shapes, ensuring a snug and secure hold.
Choosing the correct foam enhances safety and organization—much like the perfect cushion on a bumpy ride, it makes all the difference. Furthermore, selecting the right foam type can lead to improved performance and longevity for your RC equipment.
Choosing the Right Foam Density

Choosing foam density for a carry case is akin to selecting the right level of armor for a knight—too light, and impacts may penetrate; too heavy, and agility is compromised. The foam performance dramatically hinges on density selection.
- Low Density (~2 lb./ft³): Suitable for light cushioning with 0.1 to 0.3 PSI, great for delicate items.
- Mid Density (~4 lb./ft³): Offering 0.4 to 0.6 PSI, this option strikes a balance between protection and flexibility.
- High Density (2 lb./ft³ or higher): Ideal for demanding applications, providing 0.7 to 1.0 PSI for robust support.
Selecting the right density means considering item fragility, anticipated drop height, and cushioning needs—ensure your precious cargo has the ideal foam shield! Additionally, proper installation of foam cutouts within the carry case can optimize protection and organization.
Recommended Products

Instructions for Use: Since the foam sheets are compressed for shipping, please allow them some time to regain their original thickness after unpacking. For faster recovery, you can soak the sheets in water and let them dry before use

PROTECTS TOOLS & TOOLBOX: The tool box foam provides cushioning and protection to your valuable tools, preventing potential impacts and keeping them safe during transit or storage. The toolbox foam organizer inserts provide designated spots for each tool, preventing them from colliding with each other and making it easy for you to access them when needed, saving you time and effort.
Tools Needed for Cutting Foam

Essential Cutting Tools:
- Scalpel/Precision Knives: Ideal for detailed cuts, these offer control for intricate designs.
- Hot Knife Tools: Electrically heated blades that cut cleanly, minimizing crumbling.
- Scroll Saws: Great for angled or internal cuts.
Measuring Techniques:
- Steel Rulers: Crucial for straight cuts, preventing slippage.
- T-squares: Guarantee accurate perpendicular cuts, providing stability.
- Adjustable Cutting Mats: Protect surfaces while maintaining blade sharpness.
Harnessing these tools and techniques will yield professional-quality foam cutouts. Additionally, it’s important to consider the durability of materials used in the process, as this can affect the longevity of the items stored within the carry case. The right prep can truly transform a tedious task into a precision art!
Recommended Products

【Smooth and Efficient Cutting】- All hot wire foam cutter tips can heat up to temperature 100℃ within 10s. The Hot wire cutting pen can cut foam board or foam block from any angle smoothly and efficiently.

✔【3-IN-1 STYROFOAM CUTTERS】Cut or engrave foam complete tool set. GOCHANGE 3 in1 foam cutter includes 18W power adapter, 12cm & 7cm wand style hot knife, 18cm bow hot blade, 10m replacement wire for bow, and cutter holder. Whether you are a DIY enthusiast, crafter or artist, the three different cutting wands can meet your needs.
Creating Accurate Templates for Foam Cutouts

Creating accurate templates for foam cutouts serves as the foundation for a successful project, much like laying a solid first brick in a grand building. Effective template accuracy hinges on selecting flexible materials—think paper, cardboard, or thin plastic. When tracing, smooth surfaces help avoid distortions, and ensuring the template lies flat is essential.
Marking techniques are important; using fine pens or extra-long tip markers can yield clear outlines. It’s wise to slightly oversize templates, offering wiggle room for foam flexibility and adjustments. Clearly labeling edges and alignment notches simplifies cutting and assembly. Verification through trial fits with scrap foam can prevent costly errors, ensuring that every piece fits together like a well-oiled machine—ready to transport precious items safely! Additionally, implementing durable ABS construction in your designs can enhance the longevity of your foam cutouts.
Measuring Equipment for Perfect Fit

Accurate measurements form the backbone of creating foam cutouts that snugly cradle every piece of equipment. To achieve this, using the right tools is vital. Digital calipers provide precision up to ±0.001 inch, essential for capturing internal dimensions. For broader needs, tape measures deliver quick measurements, while depth gauges focus on recesses.
To guarantee a perfect fit:
- Measure maximum length, width, and height.
- Capture multiple angles to address measuring irregularities.
- Record dimensions in both metric and imperial units.
Additionally, remember to include tolerance gaps of 1-3 mm. This allows for smooth insertion without compromising fit. By meticulously recording dimensions and accounting for protrusions, the foam cutouts will not only protect the equipment but also enhance usability and longevity. Regularly inspect your RC Boat components to ensure they remain in optimal condition, which can also influence the design of your foam cutouts.
Recommended Products
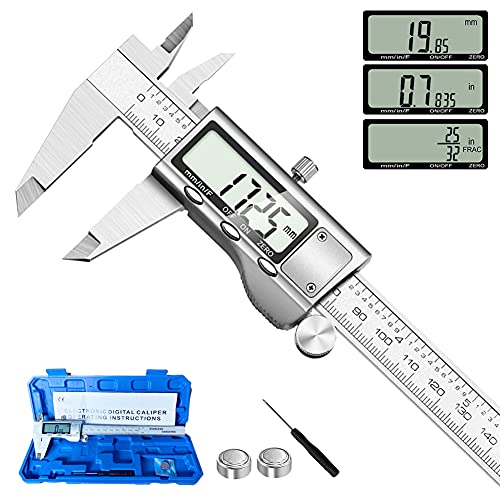
【STAINLESS STEEL MATERIAL】The vernier caliper is made of high-strength stainless steel and is waterproof and dirt-proof. The service life of this stainless steel digital caliper is longer than that of calipers with plastic or carbon fiber parts.

【PROFESSIONAL STAINLESS STEEL】 Forged from heavy-duty polished stainless steel, this 6 inch digital caliper delivers a solid, stable feel in hand. Completely eliminates the flimsy warping and precision loss of cheap plastic caliper tools for long-term reliability.

Precise measurement: Measurement range: 0 - 6''/0 - 150 mm; Resolution: 0.01”/0.1 mm; Accuracy: +/- 0.2 mm/0.01”. Perfect and accurate caliper measuring tool for household/DIY measurement
Cutting Techniques for Foam Inserts
Cutting foam inserts requires a steady hand and the right tools—like a sculptor shaping a masterpiece, every cut matters. The choice of tool greatly influences results, particularly with various foam textures.
- Tools to Use: Electric carving knives excel with dense foams, while scalpels provide finesse for shadow foam.
- Cutting Angles: Maintaining the right blade angle is essential for clean edges; too steep can lead to ragged cuts.
- Cut Techniques: The “cut and peel” method works wonders for creating smooth cutouts.
Slow, deliberate movements guarantee precision and safety, allowing for achieving that perfect fit. Proper depth control—especially with layered foam—prevents damage to underlying sections. Always remember: every cut is a chance for brilliance! Additionally, using the right cutting techniques can significantly enhance the quality of your foam inserts.
Layering Foam for Maximum Protection
Layering foam for maximum protection offers a versatile solution for securing delicate items in transport, serving as an invisible guardian against the perils of movement and impact. Employing effective foam layering strategies is essential; combining varying densities can enhance cushioning effectiveness.
Key Considerations:
- Foam Types: Closed-cell foams like polyethylene provide durability, while open-cell options, such as polyurethane, offer softness for fragile gear.
- Impact Reduction: Layered foam absorbs shock and dissipates energy, protecting against drops.
- Vibration Dampening: Mixing firm and soft layers helps isolate sensitive equipment from continuous vibrations.
- Surface Protection: Non-abrasive top layers safeguard polished finishes, ensuring items arrive scratch-free.
Recommended Products

PROTECTS TOOLS & TOOLBOX: The tool box foam provides cushioning and protection to your valuable tools, preventing potential impacts and keeping them safe during transit or storage. The toolbox foam organizer inserts provide designated spots for each tool, preventing them from colliding with each other and making it easy for you to access them when needed, saving you time and effort.

PROTECTS TOOLS & TOOLBOX: The tool box foam provides cushioning and protection to your valuable tools, preventing potential impacts and keeping them safe during transit or storage. The toolbox foam organizer inserts provide designated spots for each tool, preventing them from colliding with each other and making it easy for you to access them when needed, saving you time and effort.
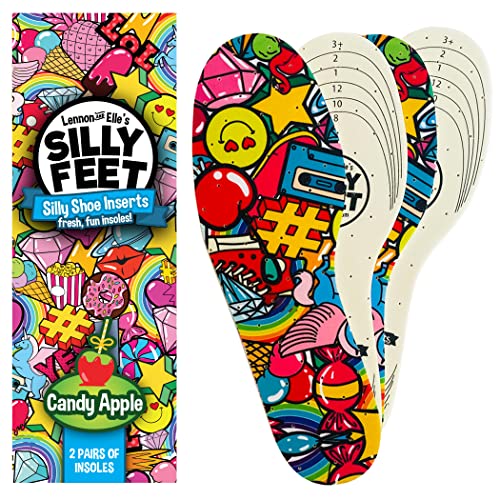
MAKES SHOES MORE COMFORTABLE & FIT BETTER: These soft foam shoe inserts are perfect for shoes too big for your kids feet. These cushioned shoe inserts for kids shoes feel like gel and are ideal to make shoes that are too big fit better.
Assembling Your Carry Case With Foam
As the framework of protection takes shape through skillful foam layering, shifting into the assembly phase marks a pivotal moment. This critical step features foam assembly techniques that guarantee your items remain safe and secure during transport.
- Base Layer: Position a solid foam piece at the bottom of the case for stability.
- Insert Placement: Carefully stack cut foam inserts, maintaining even weight distribution.
- Riser Application: If items exceed one foam thickness, use previously cut scraps to raise them, optimizing insert placement for flush closure.
- Testing Fit: After assembly, close the lid gently and check for clearance, adjusting as needed.
Finishing Touches for Aesthetic Appeal
- Color Harmony: Select shades that complement the case’s exterior, ensuring a cohesive visual impact.
- Edge Finishing: Roll fabric edges around foam cutouts to conceal raw edges and prevent fraying.
- Texture Options: Layering multiple thin fabrics can enhance tactile softness without bulk.
Lastly, inspect all areas for gaps or bubbles. A refined appearance is essential—after all, a well-finished carry case should reflect the value of its contents.
Tips for Adjusting Foam Cutouts
Achieving a perfect fit for foam cutouts can transform a good carry case into a great one, ensuring that every item is securely nestled in its designated spot. Here are some tips for effective foam adjustments:
- Test the Fit: After initial cuts, insert the item to identify any tight spots.
- Trim Gradually: Use a precision knife for adjustments, removing foam in small increments; excess can be trimmed, but adding back is tricky.
- Widen Edges If Necessary: If it’s too snug, slightly expand the edges and re-check the fit before making further alterations.
- Layering Technique: For bulkier items, consider using additional foam layers for improved support.
Advantages of DIY Foam Cutouts
The advantages of DIY foam cutouts can greatly enhance both the organization and protection of tools and equipment. These custom solutions offer designated slots, allowing for instant visual identification—goodbye, frantic searches! Key benefits include:
- Custom Organization: Tailor layouts to work habits, ensuring everything has a place.
- Tool Protection: Precision cuts cushion tools from shocks and drops, extending their lifespan.
Further, the lightweight nature of foam makes it easy to carry while keeping tools secure and tidy—fewer distractions mean more focus. The aesthetic appeal of a well-organized setup can boost motivation too; who doesn’t love a workspace that looks sharp? DIY foam cutouts are not just functional—they’re an investment in efficiency, security, and professionalism that pays off on every project.
Ensuring Safety During Transportation
Guaranteeing the safety of equipment during transportation is paramount, particularly for professionals tasked with handling fragile or sensitive tools. A robust approach to transportation safety relies on features that enhance equipment protection through customized foam inserts.
- Impact Absorption: Foam inserts act as shock absorbers, dispersing forces from drops and jolts.
- Secure Fit: CNC-cut foam shapes guarantee zero movement, eliminating rattling and reducing wear.
- Organization: Designated compartments streamline packing, simplifying inventory checks.
These tailored solutions not only shield delicate instruments from micro-abrasions but also comply with regulatory standards. Essentially, investing in the right foam protection prolongs equipment life and enhances safety, ultimately preventing costly replacements and protecting valuable tools—because nobody wants a chaotic toolbox on the go!
Frequently Asked Questions
Can I Reuse Foam Cutouts for Different Equipment?
Foam cutouts can be reused for different equipment if they provide foam versatility and maintain equipment protection. Modifications enhance adaptability, but repeated use may affect durability, requiring careful consideration to guarantee effective cushioning.
How Do I Clean Foam After Cutting?
To clean foam after cutting, one should employ various foam cleaning techniques. Using safe cleaning products guarantees no damage occurs. Carefully trim edges, then utilize brushes or compressed air to remove debris, restoring foam’s pristine condition.
Is There a Specific Way to Store Cut Foam?
Cut foam storage requires a dry, dust-free environment, safeguarded from moisture and sunlight. Implementing foam preservation techniques, such as using sealed containers and stacking layers carefully, guarantees the longevity and integrity of cut foam.
What Should I Do if My Cutouts Are Too Loose?
To address loose cutouts, one should consider foam density variations and make necessary cutout adjustments. Inserting thin shims, applying adhesive, or recutting edges can effectively enhance fit and maintain desired firmness for gear protection.
Can Foam Inserts Help With Temperature Regulation During Transport?
Foam inserts act as protective blankets, cradling temperature-sensitive items in their embrace. By varying foam density, they enhance temperature insulation, ensuring regulated conditions during transport while safeguarding valuable goods against the whims of external elements.